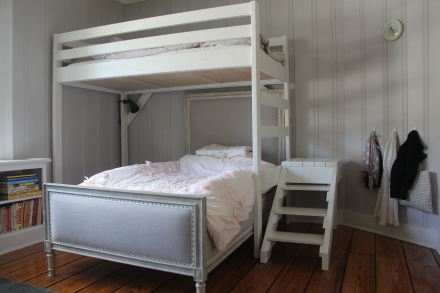
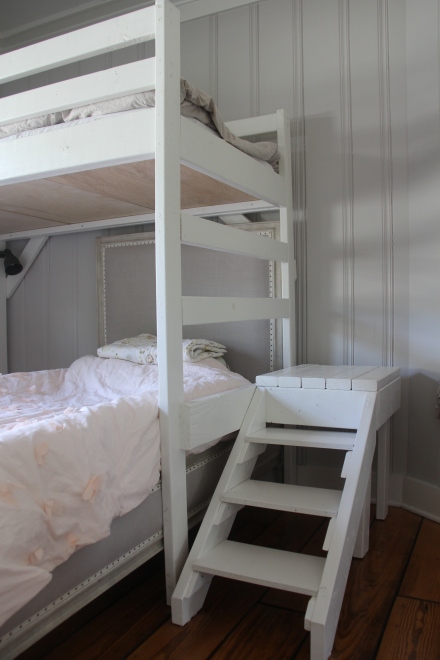
Before my youngest turned three, we promised her that once she was three she would get a “big girl bed”. Previously she had been sleeping on a mattress on the floor to get her used to sleeping on a twin mattress while not having to worry about her falling off the bed each night. A little less than a year ago, my daughters decided they wanted to share a bedroom so we moved the floor mattress into my eldest daughter’s room. While the room is a good size, having two twin beds really reduced the usable space in the room because of the shape of the room and the way the door swings.
When we moved to this house, we bought a really nice twin bed frame for my eldest daughter (she had just turned three and it was her first “big girl bed”). I didn’t want to get rid of this frame so I was looking for a solution that would maintain use of this bed but still allow both girls to have a real bed. Bunk beds wouldn’t work so I was looking for loft bed solutions. I really wanted a loft bed with stairs because I was worried about my daughter climbing down a ladder in the middle of the night if she needed to go to the restroom. Unfortunately, all the loft bed solutions with stairs that I found were both VERY expensive, and they would not allow the door of the room to open. I was a little stuck.
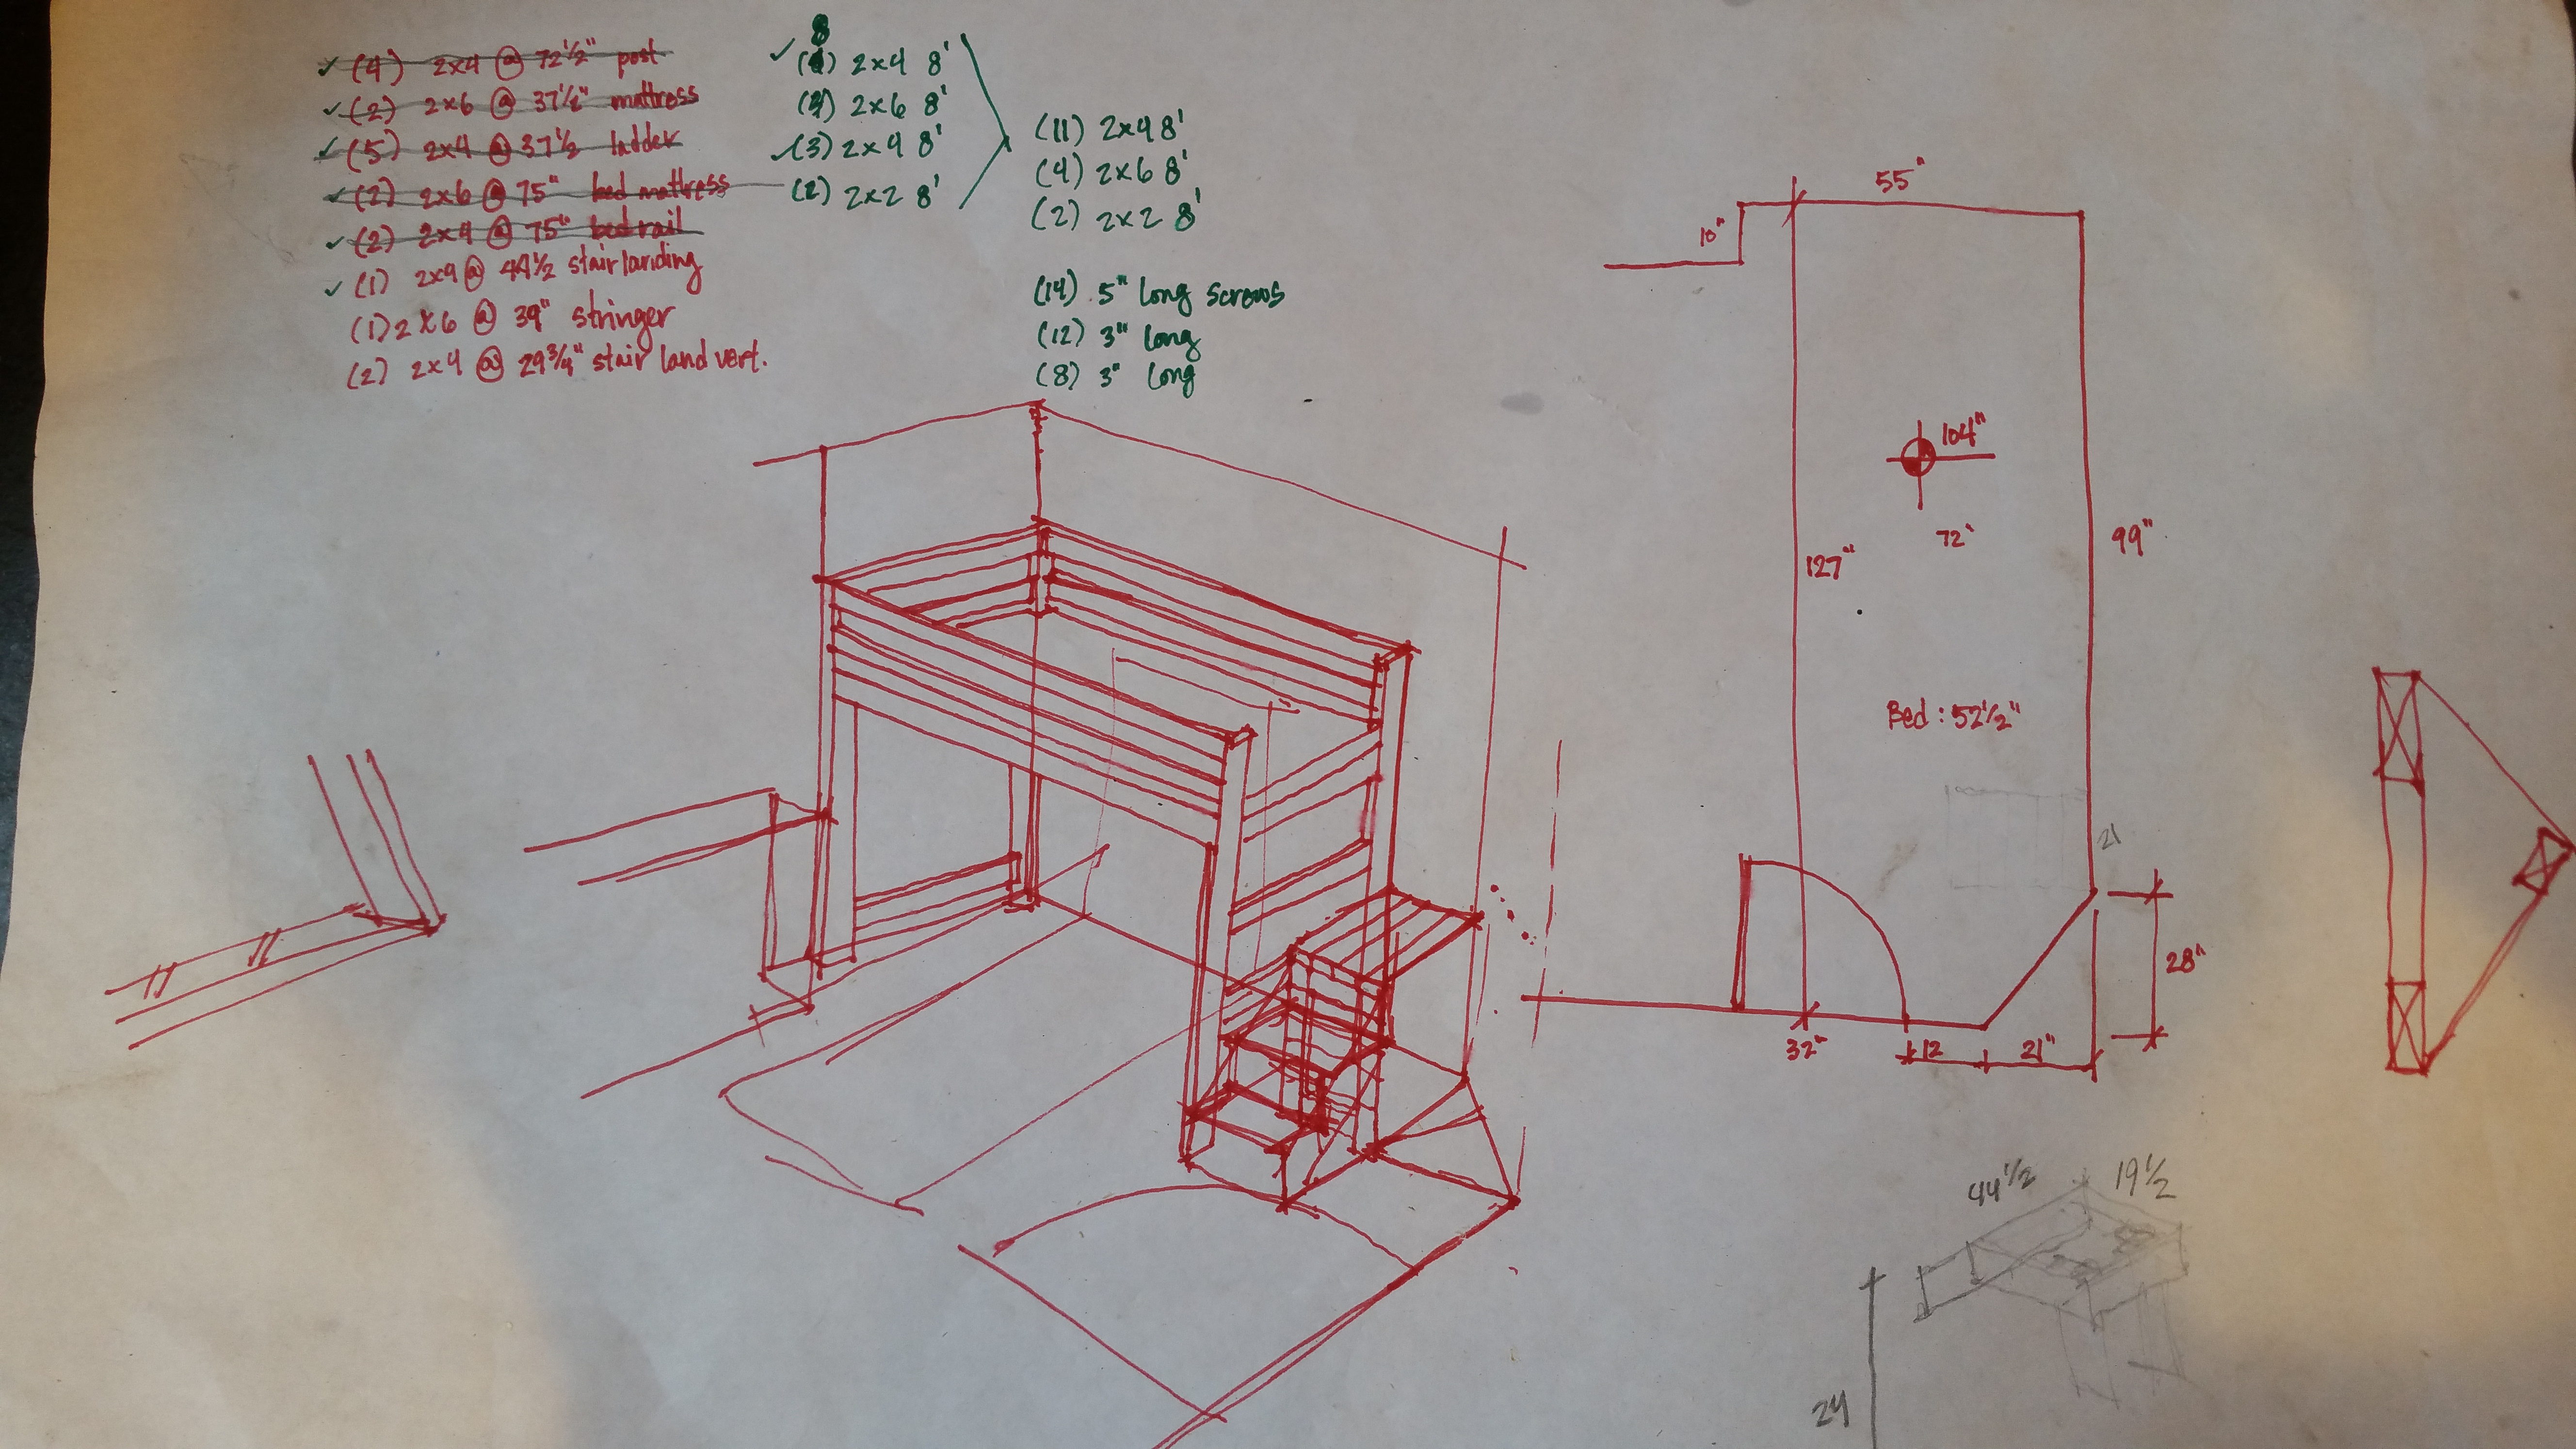
Enter, Pinterest. I started looking for different solutions and found an amazing tutorial for a loft bed with stairs that I could modify slightly to work with our room layout! I had to change some of the dimensions to fit our existing bed frame underneath as well as modify the steps and landing because of the limitations of the door swing. But, all in all, it was pretty good.
I made this bed over Memorial Day week-end. It took me about 2 full days (having to field two very curious children, borrowing some very old and not quite right power tools from my neighbors, and not having a proper worktable so rigging up bricks on my patio floor as my “cutting table”). All materials cost a little less than $300, which is about 1/6 the price of any loft bed with stairs I was able to find that might have fit in our space. Of course, being the architect I am, I had to draw it out with my modifications and the room layout to really get it straight in my head what I was trying to do. I think my husband thought I was a little cuckoo to start this project on Saturday afternoon of Memorial Day week-end, but amazingly, everything fell into place!
 My daughters were very interested to see mommy using power tools and assembling something from scratch, but I wanted to show them that this is not impossible. I was a little rusty at first and the circular saw I used was probably twenty-five pounds, but I ended up getting most of the cuts pretty straight, which is amazing given how I didn’t have a level surface anywhere and I had to eyeball a bunch of stuff.
Modifications made were really surrounding the mattress support, adding some diagonal bracing for stability, and the steps/ ladder solution. We used (3) 3/4″ thk birch plywood sheets cut down to size for the mattress support (since it was raining the day we got materials so we were trying to put everything into the car to avoid getting anything wet). Since our loft wasn’t braced on both sides by walls, I needed to add some bracing to allow for more stability when the girls climb up the top bunk. The steps were made using the leftover plywood sheets for the treads and the platform was really just scraps that I threw together to make the landing and attach to the loft frame. I have to say, I’m quite proud of the result and it felt great to be making something with my hands again.
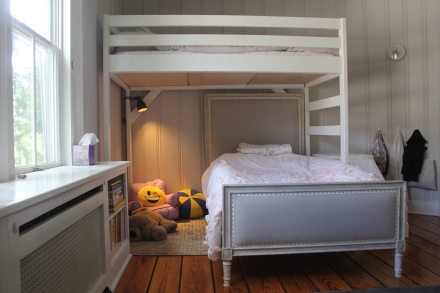
My daughters just LOVE this bed. We have attached a sheet to the top rail of the loft and use it as a curtain to create a “tent” where they read books and play together. We put a little rug and a seat and some pillows to make it more comfy. This week-end they are each getting one night to sleep in the tent with the sheet closed for a mini-adventure in make-believe land. This project is already worth its weight in gold.


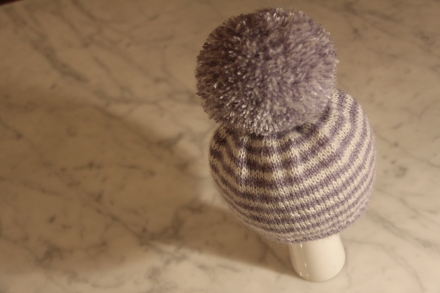 It has been a long while since I have had the opportunity to go back to what started my whole blog, which was making baby hats! I was thrilled at the chance to make another hat when I found out that one of my co-workers is expecting his first child, a sweet baby girl.